Wednesday, October 3, 2007

The Good Little (Half) Greek Girl Cooks Dinner


There’s something about cooking Greek food that just feels right to me. It could be that it’s generally a healthful cuisine, filled with lean proteins and fresh vegetables. It could be that I’ve been eating and cooking this type of food for so long that I know the flavoring and ingredient options well, and it’s an easy go-to for a nice meal (Mediterranean cuisine is probably my cooking “comfort zone”, but Jim tells me that I have a “knack” for Asian). It could be the pleasure of the flavors and aromas of the food and the warm feelings that they inspire in me-- we didn’t have a ton of Greek cuisine every day growing up, but the memories of my maternal grandmother’s food (and my mother’s, on holidays and for parties—the times when she made Greek food the most) stick in my mind and figure prominently in the way I feel about this cuisine. To me, there is no better comfort food than a big serving of spanokopita (spinach and cheese pie, wrapped in phyllo dough). Ultimately, I think there’s some part of me that just feels right when I make a Greek dinner—like I’m doing what I’m meant to be doing: carrying on family traditions while making good, healthful food to share with those around me (I largely express affection through food—which is probably obvious already in this blog). And to top it off, this food is (to me at least) the ultimate in comfort cuisine. The idea of being a dutiful little (based on my comparably diminutive size) Greek “wife” always comes to my mind as I labor over a meal of this sort…hence the title of this post (I used quotes around “wife” since I am not a wife and most likely won’t be—we’ve been engaged for five and a half years now, and I think we’re going for the gold on wedding foot dragging). So, I played the good little Greek girl last Wednesday night, and prepared a dinner of chicken and veggie kabobs, with saffron and mint brown rice and tzatziki sauce to go along. The only thing that was missing was a pan of spanokopita, either to accompany the meal or as an appetizer (no time on the weeknight; plus I hate squeezing the liquid out of frozen spinach). (As a side note here: appetizers should really be called “de-appetizers”, since they really just ruin your appetite for dinner rather than making you hungry…but I digress).
I prepared the marinade and got the chicken and veggies soaking around lunchtime, so they would be good and flavorful by dinnertime (one plus to working at home—does it counter the “minus” of feeling like you should be working any time you’re at home? I don’t know yet). The early preparation of the marinade and commencement of the flavoring process would also ensure that thereafter I could work straight through the rest of the afternoon and through dinner since I wouldn’t have to do any more cooking beyond the skewering of meat and veggies and the preparation of rice (yes, I worked while I ate dinner—I work through just about every meal these days).

You can see the glistening kabobs below, both in their raw and cooked form. When the chicken and veggies emerged from the plastic bags in which they had been marinating for hours, the smell of the food was already stunning. This aroma only improved after the application of high heat. Thankfully, grilling such small pieces of meat is quick work (and easy work—for me at least—since Jim is in charge of the grill; I admit that I’m a bit afraid of the propane tank). The meal did not disappoint—the two of us finished off the nearly 1 cup of rice that I made and almost all of the chicken and veggies. Sometimes, I wonder what the hell I was thinking in my choice of dinner dishes…not so tonight. This meal was just what I craved…we will have to do this again soon.
Plenty of garlic...I love, love, love my garlic.

And yes, I did get a new camera (a lovely Pentax digital SLR; a little present to myself for surviving the month of August , which included the absolute worst birthday I’ve ever had).
Marinade for Chicken (or any other meat) and Veggie Kabobs

Juice from a 14 oz can of diced tomatoes*
2 T chopped fresh rosemary
¼ c chopped fresh mint
½ t cinnamon
1 t paprika
½ t cumin
1/8 t clove
1/8 t allspice
1/8 t ground turmeric
½ t dried marjoram (or oregano, if marjoram isn’t available)
¼ t ground red pepper

¼ balsamic vinegar
¼ c dry white wine (or sherry, or red wine)
Juice of 1 lemon
1 ½ HEADS garlic, minced or put through garlic press
Salt and pepper to taste

Combine all ingredients in small bowl. Place meat and veggies in separate dishes or gallon size zipper freezer bags (I prefer the bags, even though it’s wasteful, because the marinade is more efficiently distributed). Pour half of the marinade over the veggies and half over the protein. Seal and soak as long as you can—the veggies can go a very long time, and chicken or beef can probably soak up to 6-8 hours before the texture is compromised (if using seafood, back off of the time substantially--the seafood will start to "cook" in the acidic wine/tomato mixture and the texture will change substantially. Go no more than between half an hour to one hour with seafood).

Veggie mix suggestions: red onion, bell pepper (any color: I love the red ones), summer squash (green and yellow—for variety), mushrooms, cherry tomatoes. Hell, whatever you can skewer or roast.

* I really wanted tomato sauce, but had none—juice from a drained can of tomatoes plus a few of the tomato pieces did well enough (and the leftover tomatoes were incorporated into a veggie lasagna on Friday…yum). But if you have tomato sauce, use some of it and maybe water it down with some extra wine.


Tzatziki Sauce

½ of a long English cucumber, diced small
6 oz fat free Greek yogurt*
¼ c (+ more if you like) chopped fresh dill
1 to 1 ½ t pressed garlic

Mix all ingredients together. Season with salt and pepper to taste. Chill to meld flavors.

*This is important: Greek yogurt is pre-strained and thick. If you use “regular” yogurt, let it drain overnight in the fridge in cheesecloth (or coffee filters, my preferred material) to eliminate the excess liquid.

Saffron and Mint Brown Rice

½ of a sweet yellow onion, diced
5 cloves of garlic, minced or put through garlic press
1 c short grain brown rice, rinsed (our recent favorite—use long grain if you prefer)
¼ c dry white wine or sherry
pinch saffron threads
1 cup water
¼ c chopped mint

Sauté onion in a medium saucepan. When softened, add garlic. Meanwhile, combine wine and saffron threads in small bowl; stir to dissolve/break down saffron. When garlic is soft and fragrant, add rinsed rice. Sauté about 1 minute and then add wine/saffron mixture. Let excess moisture boil off, then add 1 cup of water. Allow mixture to reach a boil; lower heat and cover. Cook until rice is tender, adding more water if necessary. When rice is cooked, remove from heat and stir in chopped mint. Serve.

Thursday, September 27, 2007

This is Why I Love Whole Foods

Or other stores like it that sell quality food. These breasts came from the SAME CHICKEN. How do I know? Well, they're attached. These are boneless skinless chicken breasts, and they are still attached in the middle. Instead of the Franken chicken breasts I'd get from another grocer, one of which would probably be double the size of the other, I have two chicken breast halves that came from the same animal. There's just something comforting about that.

Friday, September 21, 2007

The World's Most Perfect Sandwich


Toasted whole wheat bread, with generous amounts of whole grain mustard (on both slices).
Avocado--just a bit--so soft that it spreads onto the bread like butter.
Oven roasted turkey breast (Applegate Farms--no nitrates here)
Heirloom tomato, sliced thinly
Thin slices of mango
Sprouts--these are broccoli and clover
Spinach leaves

This is based on a sandwich I had last August while I was on vacation in Phoenix--the mango is so sweet against the tang of the mustard, and the avocado is so creamy and indulgent. I had the sandwich that day, and loved it so; I've been making my own version of it at home ever since. I am convinced that this is the world's most perfect sandwich (well, for me at least).

This (and a salad) was my lunch yesterday, during my morning and early afternoon of work at home. Sometimes, I crave the most simple of meals. In my view, one of the most satisfying meals is a combination of two or more of the following: soup, salad, sandwich. A tasty and filling lunch, and a nice break from the stresses of the day. Now, back to work for this morning...dreaming of lunch later in the day.


Monday, August 20, 2007

Jim Stayed Home from Work Today So I Made Him Breakfast

He stayed home today for no reason other than not wanting to go to work and to keep me semi-company as I work at home today. We see a lot less of each other lately, now that I work nights and somehow ended up with three jobs (more on that in a later post, perhaps). He mentioned late last week that he was contemplating a three day weekend; I taunted him all weekend that he would end up staying home because “the seed” had been planted in his head (speaking for myself, if I even consider calling in “sick”, that’s usually the end of it). I wanted to celebrate this three-day weekend by making him a nice breakfast before I began my work for the day (and to make up for basically challenging him to stay home—and winning). Also, I had buttermilk and turkey sausage that I wanted to use up…and a very ripe banana that I could toss in as well. So, when he came downstairs this morning I offered to make him buttermilk pancakes and maple turkey sausage. I got no arguments.

As I raided the cabinets for ingredients, the original “buttermilk pancakes” became whole-wheat banana pecan buttermilk pancakes. The use of whole wheat is pretty predictable for me; I’ll only use AP flour when it’s completely vital to the texture of the final product, when I’m desperate because I ran out of whole-wheat flour, or when I’m baking for a crowd who may not delight in the more healthful sweets that I enjoy the most. In my whole-wheat baking experience, I’ve found that whole-wheat pastry flour has a fine enough texture that it can be totally substituted for AP flour without worry in almost any application. Not so for regular stone ground whole wheat flour, however, which is usually made from hard red winter wheat rather than the white winter wheat that the WW pastry flour is made from (to my understanding, from my as-yet limited internet research and general reading). So, in creating the flour mixture for these pancakes I opted for two-thirds WW pastry flour and one-third stone ground whole wheat flour; I wanted the pancakes to have the hearty flavor of whole wheat but not the leaden texture that would likely result from the use of all stone ground WW flour.

Breakfast came together very quickly—mix the dry ingredients, mix the wet ingredients separately, combine and then begin pancake prep while the sausages cook in a skillet. Unfortunately, I do not own a griddle (one thing on the not-so-short list of kitchen items I’d love to obtain). So, the pancakes were cooked in pairs in my 10-inch omelet pan; the early finishers sat on a stoneware plate in a 200-degree oven until pancake cooking was complete.

I nibbled on a pancake with my usual custard cup of mango on the side, while Jim enjoyed a heaping plate of pancakes, coated generously in maple syrup (see previous posts for mentions of his maple-syrup-lust) and maple turkey sausage on the side. After receiving the verdict on my pancake experiment (good reviews, that’s a relief), I trudged downstairs to begin my work for the day and left him to enjoy the morning paper while he finished his breakfast. As I worked, I eventually heard the pleasant sound of the pans being washed in the sink. Thanks for cleaning up, babe:)

Whole Wheat Banana Pecan Pancakes
1 cup of whole-wheat pastry flour
½ cup of stone ground whole wheat flour
1 ½ t baking powder
½ t baking soda
½ t salt
2 ½ T granulated sugar
½ t ground cinnamon
grated fresh nutmeg to taste
1 egg
1 egg white
1 ½ c non-fat buttermilk
1 T vanilla extract
1 very ripe banana, cut into small pieces
¼ chopped pecans

Mix the dry ingredients, up to the nutmeg in a large bowl. In a smaller bowl, whisk the eggs, buttermilk and vanilla until combined. Add the wet ingredients to the dry and mix until just combined. Fold in the banana and pecans. If you’re fortunate enough to have a griddle, use it; otherwise, use a poor-man’s griddle like I did—the largest, flattest pan you own. Ladle about ½ to ¾ of a cup of batter at a time, cooking until they appear set around the edges and bubbles begin to emerge at the top. Flip and finish cooking. Keep the first batches warm in a low oven (200 degrees) until ready to eat. Dress them (or not, as I did) as you wish for serving.

Monday, July 9, 2007

Christmas in July

I hate to waste food. Since I’m somewhat of a cooking fanatic, we spend a ton of money each month on groceries (really more than I like to face up to, and I track the grocery expenditures carefully in Excel—my secret-software best friend—so I know what the exact damage is, ouch). So I pounce on any opportunity to freeze and save leftovers for future use—sometimes being a little ambitious about the likelihood that we’ll whip out a given frozen leftover in the future. (A prime example: a wheat berry stuffing that we had with chicken once; it was tasty at the time and we had a ton it leftover so I froze it, but chances are that if I’m stuffing a chicken in the future I’ll probably opt for a fresh stuffing). I made a big batch of gingerbread cookie dough during the last holiday season; this recipe makes four big balls of dough, each of which probably makes 30 to 40 cookies. I rolled and cut gingerbread shapes (not all men; sorry, guys) out of the first two balls, but got fatigued and decided to cut my cookie making short and freeze the remaining dough (cooking nut that I am, chances are—particularly during the holidays—that this cookie making probably followed 10 to 12 hours of standing in the kitchen that day making various creations; even I get tired—sometimes). So I froze the two remaining balls of dough and they’ve now been occupying space in our ridiculously cramped upstairs freezer for about six months. These could be frozen with confidence that they’d be revisited someday—we might not be salivating over leftover wheat berry stuffing, but there’s a definite appeal to having cookie dough at the ready any time.

Six months is, I think, about as long as you probably want to keep frozen cookie dough around before it’s quality and safety begins to become questionable. Knowing that the dough is in there—and that I need to use it soon—I’ve been toying with the idea of rolling out the dough to use it as a crust for a tart or pie for a few weeks. I had not settled on the flavor of the filling yet (I had a few general ideas floating around my head), but I had finally settled on making a tart. The problem with this was that I do not own a tart pan…but I do have a ton of leftover Williams-Sonoma gift cards (a great gift for a cook—keep ‘em coming guys), and I’ve eyed their tart pans before. So, on Friday evening—after my last full day of office work (as an update: I quit my job, got a job in the bakery counter at an-as yet to be named-national grocery store chain that prides itself on the sale of organic and other high-quality goods), I stopped by WS (ok—the abbreviation here—I’m not a sick and disgusting yuppie, I swear. I am, however, a really lazy typist) to obtain a tart pan (9.5 inches, nonstick). Now I’ve got the equipment, and I just need to formulate an idea.

Many of my recipe ideas come to me during my daily workout. The ultimate use for this gingerbread dough was no exception. On Saturday morning, on the Nordic Track, I was pondering the potential filling for my tart-creation. I was thinking about a vanilla pudding/custard filling (light, of course—any way I can do it, knowing me), perhaps with some fruit on top. The problem there was that I would want to use actual vanilla beans for maximum effect, but didn’t really want to go out that day and spend $7-10 on a jar of vanilla beans (yes, they’re expensive and it’s the end of the month and I can see that I’ve far exceeded my targeted grocery spending). Ok, axe the vanilla custard. Perhaps some sort of cheesecake-type filling…but what flavor? I pondered this for a bit and suddenly a thought came to me…Gingerbread Latte. Yeah, coffee and gingerbread go pretty well together, as a certain coffee chain has shown us. I’ll make a coffee flavored cheesecake-type filling (light, of course), with a tad of whipped cream on top, and call it a Gingerbread Latte Tart.

The gingerbread dough was made according to a recipe from Eating Well magazine; it is entirely whole wheat (I differed from the recipe on that point, because they call for some AP flour) and contains butter in a more reasonable proportion than most cookies. So while the crust for the tart would be composed of cookie dough, this is a less-unhealthy cookie dough than most. I won’t give the recipe here, but will direct any interested parties to the Eating Well website, where the recipe is posted (and feel free to use all whole-wheat pastry flour in place of the whole wheat + AP flour—works fine, tastes great).

I took the cookie dough out of the freezer on Friday night, after I had secured the tart pan, and allowed it to thaw in the refrigerator until the next day. On Saturday evening, before dinner, I rolled the dough out to about a quarter inch thickness and did my best job at getting the rolled dough into the tart pan in one piece. Of course, it ripped in several spots. This was an easy fix, however, because in the process of pressing the dough into the tart pan, I was able to mend any tears that had occurred. After pressing the dough into the bottom and up the sides of the pan, I lightly pricked the dough with a fork in many places (to create holes for air to escape, thereby preventing the dough from rising too much and leaving room for filling). I set the pan on a cookie sheet (for easy deposit and removal from the oven, since the pan has a removable bottom) and baked the crust at 350 degrees for about 10 to 12 minutes. I removed the crust from the oven and observed that it had puffed up more than I had wanted. To deflate the crust, I again poked it lightly with a fork in several places; the crust collapsed to an acceptable height and I allowed it to cool on top of the oven while I prepared the filling.

I have made a ton of cheesecakes over the years, so the filling was very familiar territory. I didn’t want to have to bake it for long (I wasn’t sure how much additional baking the cookie crust could take before beginning to burn), so I wanted a less loose mixture than my typical cheesecake formulation. The problem caused by my cheesecake familiarity is that I basically combined a bunch of ingredients by sight, with little or no measuring, until the mixture looked and tasted about right…so there’s no real “recipe” to impart to you. But, I’ll try to summarize and estimate in order to provide some kind of idea of what the mixture was composed of (and maybe someday make it again and actually measure this time). I softened about 12 ounces of light cream cheese while the crust baked; when it was softened adequately, I added it to my stand mixer and mixed on medium-low speed to further soften it and prepare it for the addition of sugar. I then added about ¼ c plus 2 T of white sugar and maybe about 1 T of brown sugar (by sight and taste; no measurements here) and mixed well. After this was well incorporated, I added one egg and one extra egg white and mixed until the new addition was integrated into the mixture. After eggs are added to the cheesecake mixture, the more liquidy ingredients can be introduced, so I next added about 2 T of cold brewed coffee, 2 T of 1% milk, a couple spoonfuls of light sour cream and 1 ½ T of instant espresso powder. I also added about 1 T of bourbon, because there are few things that won’t benefit from the addition of a little liquor (especially cheesecake; I routinely add rum to my vanilla cheesecake–it gives it that extra little “something”). I mixed on low speed until these ingredients were fully mixed-in, tasted the mixture for flavor (I had initially added less espresso powder and through tasting got up to the final amount quoted above—needs more coffee!!). I then poured the batter into the pre-baked tart shell and put it in a 325-degree oven. I think that it took about 20 to 30 minutes to reach the proper temperature in the center of the cheesecake mixture (160 degrees—to make sure those eggs are cooked; a digital instant read thermometer is a cook’ best friend). I removed it from the oven and allowed it to cool on the countertop until it reached room temperature. Once this state was achieved, it traveled to the refrigerator to set and chill. After a long period of chilling, I piped some freshly whipped cream on top (sparingly, around the edges, and a dot in the center to cover up the hole where my instant read thermometer was inserted). It surely looked good enough to eat.

We tasted some after dinner and the review was positive; the coffee flavor of the cheesecake complimented the gingerbread well. This made a 9.5-inch tart and there are only two of us, so leftovers remained in the fridge for a few days (which isn’t too bad, because cheesecake actually gets better when given a few days to rest). The crust softened a bit after a couple of days in the fridge, which I was told was a positive development because the initial crunch of the crust made the tart more difficult to eat. So: overall, this attempt at eliminating food waste was a success; I managed to create a new dish from leftover frozen cookie dough that I will most likely endeavor to make again. I’m filled with glee and a bit of shy pride for my creation. It’s like Christmas in July.

Monday, June 25, 2007

How “the cake” was made

A couple of weeks before his birthday party, I started pumping Jim for info on what type of cake he would like for the occasion. His usual favorite cake is a chocolate cake with white frosting. But I told him to use his imagination in formulating this request—do you want a mousse filling, for example, or a special flavored cake or frosting? (I had made a white cake with a raspberry mousse filling and whipped cream frosting for my sister’s 30th in Fall 2004, so I felt up to the task). Being a maple nut, he requested on “something maple”; we settled on a chocolate cake with a maple frosting. We agreed that the cake would be the low-fat chocolate cake that I usually make for us (which is shockingly moist and rich for its lack of butter and oil) and a full-fat frosting (it is a celebration, right? Plus, you’ve got to please the “crowd”). I had never made a maple frosting before—so let the research begin.

At first inspection, it seemed as though I would be adding maple flavor (presumably in the form of maple syrup—Jim’s favorite) to a basic vanilla frosting. The two obvious choices of base-frostings to which I could add the flavor were cream cheese frosting and a buttercream. Putting my dictatorial kitchen nature aside, it being Jim’s birthday and his choice, I offered the two alternatives: Maple Cream Cheese frosting or Maple Buttercream. Butter? Cream? Buttercream was the fast answer. Jim has probably had plenty cream cheese frosting over time, and wasn’t terribly intrigued at that suggestion anyway: I make cream cheese frosting frequently, just for kicks—it’s my guilty pleasure when I’m feeling very, very bad. No cake necessary; just Tupperware to store it in and lots of clean spoons for snacking. Having powdered sugar and cream cheese in the house at the same time is very dangerous for me—I swear the stuff just makes itself.

Anyhow…the frosting was chosen. Not only had I never made a maple frosting before, I had also never made a buttercream. Before I had the chance to perform any research, I had assumed that buttercream frosting would consist of a ton of butter and a ton of powdered sugar, with maple syrup added as a flavoring. I was wrong; this is what constitutes an “American” buttercream, but your classic bakery butter cream is far different. My research uncovered the fact that classic buttercream is actually a combination of egg yolks, hot sugar syrup and a ton of butter. Great. When we went to Costco, I bought was must have been a 10 pound bag of powdered sugar, under the assumption that half of it would be used in the frosting; I guess not. (As a side note, I did break into that bag of powdered sugar soon after to make…cream cheese frosting. But I didn’t stop there—I made peanut butter chocolate cream cheese frosting. No cake, just frosting. Finger lickin’ good.).

As an aside: I realize that recently, this blog is not sounding much like the “healthy” home chef but more like the hedonist home chef. Buttercream is an exception, not the rule; and cream cheese frosting is a guilty indulgence that I try not to fall to, but sometimes do. Our diet does not typically consist of these things—once “party” season is over and we get back to everyday cooking, the health factor of these entries is likely to improve. Now back to frosting…

There are other variations of buttercreams, some of which use egg whites, some of which use yolks only, and some of which require the separate preparation and subsequent combination of a Crème Anglaise and an Italian Meringue. I researched buttercream frosting for about a week and consulted probably 20 to 30 recipes in that time, before finally settling on the Neoclassic Maple Buttercream from Rose Levy-Barenbaum’s The Cake Bible. This is a French style Buttercream, meaning that it’s basic constituents are beaten egg yolks, with a hot sugar syrup beaten in and a ton of butter. Typically, the creation of the hot sugar syrup requires the use of a candy thermometer, because you want the sugar to reach the soft ball stage, but not to go beyond this point (which is a much easier call to make if you use a candy thermometer—the other alternative is taking a small amount of the syrup, dropping it in cold water and observing its behavior; a little too much like chem-lab for me). The beauty of this “Neoclassic” buttercream is that it starts off with syrup (the non-maple version uses corn syrup), which contains enough water so as to prevent its temperature from going above 238 degrees (the soft ball stage temperature). So, I didn’t need to run out and buy a candy thermometer or to learn how to use it. Whew, dodged that bullet.

I arrived home from work on Friday night (the party was the next day), and began the frosting preparation. You’ll notice from the photos that we were sharing some fine beers as I did my preparations. I tried to drink slowly, so as not to become too impaired. But, Jim and I often joke that I must be talented in the kitchen because cooking is just about the only thing that I can do just as well drunk as sober (knife usage aside). That being said…onto the frosting:

To start, I took a ton of butter out of the refrigerator to come to room temperature. Cold butter added to the egg and sugar base would cause butter-lumps in the frosting, which are certainly not an attractive feature. The butter would be added last, but had to be above 65 degrees when it was used to avoid this problem. It would take a while to achieve this temperature—even with it cut into small pieces—since the butter had just emerged from the refrigerator. You can see below the continuous butter temperature monitoring; I didn’t want to have the frosting base ready to accept the butter until the butter was warm enough to be used. So the full start of the frosting preparation hinged on the very slow temperature increase of a pound and a half of butter, cut into tiny bits (yes, a pound and a half; when Jim saw it, he exclaimed, “wow, that’s a lot of butter—I don’t think I’ve ever seen so much butter in one place).


Not there yet.

Still not there.

Dear god, how long does it take to soften butter?


Damn it, just a few more measly degrees to go.

Once the butter was reaching the goal-temperature, the preparation of the frosting base began. The frosting base would consist of beaten egg yolks, with a hot sugar syrup beaten in. Since the sugar syrup would be hot and ready for immediate usage once it was prepared, I began by beating the egg yolks (9 of them; yes, 9) until they were pale in color. After this was complete, they were ready to receive their syrup.

The syrup: First, I greased a measuring cup; the hot sugar syrup would be poured into this cup once it reached the proper temperature and the grease would ensure a clean release as the sugar syrup was poured into the eggs. I combined sugar and maple syrup in a saucepan, and stirred until the sugar dissolved and the mixture came to a rolling boil. As soon as this boil was achieved, the mixture was pulled and poured into the greased measuring cup.


I then gradually beat the hot syrup into the egg yolks in a steady stream, using caution not to allow the syrup to contact the beaters, and instead to go directly into the eggs. If the hot syrup contacted the beaters and got flung around the sides of the bowl, it would harden immediately and we’d have crunchy bits in our frosting (yet another unappealing feature I’d like to avoid). Once the syrup was added, the beating continued (and continued, and continued, ugh.) until the mixture was cool again. Once the egg-sugar mixture was cool, the butter could be added. I added the butter, one tiny piece at a time, as I beat the mixture. It took a long time to actually begin to look like frosting; I probably had about one-sixth of the butter left to use when the mixture finally stopped looking ultra-loose and began to take on the texture of a frosting. I was relieved when that finally occurred. Finally, the last of butter was added and the frosting was complete. Challenge met.

Now for all of that butter. Just look at that pile of butter.

Thank heavens--it finally resembles frosting.

Next, the cake assembly. I had prepared the cake layers the previous weekend and had frozen them, wrapped in plastic wrap and stored in heavy-duty freezer bags. The cake is based on a recipe from Eating Well magazine, called “Died and Went to Heaven Chocolate Cake”; for a low-fat cake, it is truly amazing. When I make it for us, I even substitute all whole-wheat pastry flour for the AP flour they call for, and the texture is always moist and lush and the taste chocolaty and rich (they have the recipe on their website: check it out, I beg you). I had taken the layers out that morning to thaw at room temperature so they’d be ready for evening usage. I unwrapped them, and began to build and frost the cake. Cake frosting is not too complicated; probably the only lesser known technique is the use of the “crumb coat”. A thin layer of frosting is applied to the entire cake, to seal in errant crumbs and the final, full layer of frosting is added on top of the crumb coat. After the full frosting layer was applied to the cake, out came the pastry bag for decoration. I’m capable enough with a pastry bag, but I haven’t practiced enough to do more fancy decorations like shells and flowers. Some day, perhaps, but not tonight. I also prepared a simple colored powdered sugar frosting to be used to write the obligatory birthday message atop the final product.

Here come the layers.


Yes, there was a wardrobe change in there--my first shirt was toast by the time I finished the frosting.


Pre-pastry bag.

Mid-pastry bag.

Done.

And there it is, with my dumb smiling ass behind it. Mission accomplished. Now to prepare everything else for the party the next day…


Saturday, June 2, 2007

Tuna Salad Nicoise

At the mention of an entrée salad for dinner, Jim’s eyes perk up. I find his funny, since I normally have to force a side-salad on him as an accompaniment to dinner (sometimes I let him get away with his lame excuse for not having one—“I probably shouldn’t; I had all that cheese before dinner and I’m kind of full”—but sometimes I insist). An entrée salad at home will usually involve a healthy dose of salad greens, with a greater variety of additional vegetable toppings than I typically add to side salads, some kind of hot meat or fish and a homemade salad dressing. The entrée salads that I’ve prepared in the past have been absolute hits, so the suggestion of a Tuna Salad Nicoise for Monday night was met with immediate agreement on his part. We had a fairly heavy weekend of food and drink, and a salad seemed like a cleansing option for the end of the weekend.

I’ll begin by saying that I don’t know what exactly constitutes a Tuna Salad Nicoise. (Nicoise, as Jim and I found out after Googling it on Sunday, means “as prepared in Nice, France”—he asked me, I didn’t know and Google, as always, provided a link to a quick answer). I’ve seen them on restaurant menus, in magazines and on cooking programs, and know that they will typically contain new potatoes, cooked green beans, nicoise olives and seared tuna (among other things) atop a bed of greens with some sort of vinaigrette dressing. So, that provided a starting point, at least…but I like to have fun with these entrée salads, so we’ll likely be adding much more than that.

Our salad would include the basics that I mentioned above: lightly steamed green beans (I like my veggies crunchy, so they still resemble vegetables), new potatoes seasoned with pepper and poached on the stovetop in vegetable broth, chopped nicoise olives (the Whole Foods olive bar is the best, bar none) and tuna coated with cracked pepper and seared rare. In addition to these components, I added the following:

  • Chopped jarred roasted red peppers (I love these things—they make a great addition to just about anything; as long as you’re careful to buy them packed in water, not oil; and there’s little or no prep involved. Haddon House makes a great water-packed jarred roasted red pepper. When you pull them from the jar, you get a full red pepper—not pepper pieces as I’ve experienced with Cento and other brands.)
  • Cremini mushrooms poached whole in vegetable broth and then sliced (we’ve really been enjoying hot mushrooms on salads recently—they’re so juicy and the hot mushrooms add so much to a salad otherwise composed of cold inputs
  • Frozen artichoke hearts, defrosted and poached in vegetable broth (noticing a theme here? I used the same pan and the same medium to cook/heat all of the ingredients that required it; as one ingredient was done cooking it was put aside and the next was up for cooking—one pan, little clean up.)
  • Caramelized red and Vidalia onions (see the Pizza entry for instructions on their preparation)
  • A few chopped almonds, for texture contrast (and great flavor; almonds are just divine)
  • The typical salad fixings assortment of diced cucumber, carrot and bell pepper (I keep a contained of pre-prepped salad fixings in the fridge at all times, so salad preparation is always fast and easy—so this was ready and waiting for me)

I had about three quarters of a pound of tuna medallions, which I coated with cracked pepper and seared in the same pan I used to heat all of the warm inputs listed above (wiped clean first, of course, because you wouldn’t get a searing with all that liquid in the pan—we weren’t going for steamed tuna tonight). We love our tuna rare, and that’s how most of it turned out. One of the pieces was a bit smaller and I should have pulled it sooner, so it would have been at our desired level of “doneness”. Oh, well; next time. Even not-so-rare tuna tastes good…

The salad dressing was a strawberry balsamic concoction. A few months ago we had some pears in the fridge that were nearing their end, so I prepared an entrée salad using grilled chicken, sliced pears, bleu cheese and walnuts, and topped with a strawberry dressing I threw together. The salad was good. The dressing was spectacular. For this salad, I tried to repeat that glory. I halved about 6 strawberries (I quartered the larger ones), and added these to my mini food processor with about 2 T of balsamic vinegar, a bunch of fresh thyme stripped from the stems, about 6 cloves of roasted garlic (I had popped a head in the oven earlier while I prepared other items; now it was out and cool enough to handle), about a quarter cup of orange juice, about 1 t of fennel seed and about a tablespoon of whole grain mustard. I blended these ingredients in the food processor until smooth, adding extra liquid and flavoring as needed until the dressing was just right. Presto: salad dressing. The mini food processor is a great item to have for these types of preparations; it’s small, easy to handle and easy to clean (easier than the gigantic Cuisinart, at least). I gave Jim an early taste, with my usual question put forth: “do you want this on your salad?” Affirmative.

We had some toasted bread with our salads, with a spread of goat cheese on top. Goat cheese has such a pleasant tang, and is naturally lower in fat and calories than most other cheeses. We use it often in grilled cheese sandwiches (I make grilled cheese sans butter—just a spray of olive oil; this is why I usually refer to them as “hot cheese sandwiches” at home, to avoid confusion), omelets, and even atop tacos, etc. I’ve actually just about replaced my cream cheese for toast with goat cheese; it spreads almost as well, has a ton more flavor and is a little less processed than cream cheese.

This was our Memorial Day meal, the last hoorah of a three-day weekend before the inevitable and painful return to work. At least this week is only four days long…that makes it a bit easier to stomach. Now we can spend these next four days dreaming of next weekend…

Wednesday, May 23, 2007

Ok, so this has nothing to do with cooking

But I just had to share...
J&L in San Francisco last weekend. The most beautiful city in the US. Ahhh. Thank you to the new Dr. Frome (Andrea) for giving us a fantastic excuse to visit your lovely city:))

Isn't this pretty?


Isn't it lovely? I generally try not to pat myself on the back (I generally think that humility is among the most important qualities one can strive to possess) but I just think it's beautiful and feel the need to share. This was Jim's 40th birthday cake (for the public party). It's a chocolate cake (our usual low-fat formula), with Maple Buttercream Frosting (per his request).
I am in the process of writing a more detailed entry on the preparation of the cake, but I had to put a "teaser" up in advance. Jim took a great bunch of pictures of the process, and I’m hoping it will be a fun and informative entry—once I manage to find the time to type it out.

It's amazing how little personal fulfillment I get in my job, where I spend most of my time, but looking at this cake fills me with a feeling of such accomplishment. Oh well, that's what spare time is for...more on the full process involved in the preparation of this cake to come shortly…

Quinoa Pizza Dough Update

In an earlier post, I gave the formula for quinoa pizza dough. While tasty, this dough was not easy to work with; none of the batches that I had made had the necessary stretch to allow me to form a pizza with a thin enough crust. So, the crust was tasty but the crust was just too thick for each slice (and I couldn’t make a pizza large enough in diameter to accommodate all of the toppings I prepared—so the pizza tended to grow upwards, like a skyscraper).

I suspected that the lack of “stretchiness” was due to the lower gluten content of the dough, since quinoa is apparently a gluten free product. A couple of weeks ago when we had pizza night, I added about 1 tablespoon of Vital Wheat Gluten to the flour mixture before adding the oil and water. This made a world of difference in the ease of working with the crust, and also vastly improved the texture of the finished product (it had a much more satisfying bite). It does not adulterate the flavor at all, but instead only improves these other attributes. I purchased a small box of it at WFM, which had instructions for inclusion in baked goods (based on the amount of flour you’re starting with). So, if anyone is actually reading this and is interested in preparing the quinoa pizza dough (in the “I’m Unemployed; Let’s Have Pizza” entry), try adding some Vital Wheat Gluten when you combine the flours in the food processor.

Saturday, May 12, 2007

The Injured “Chef"

I have been felled by an injury. It was incurred while dancing, intoxicated, at a wedding. In Las Vegas. I fell on the floor, basically flat on my face except for the fact that my shoulder got in the way. The diagnosis: Severe tendonitis of the shoulder, with extremely limited range of motion and basically constant pain. The treatment: ice, heat, Advil and Vicodin (thank you, Dr.). The good news: I might think twice about dancing in public again, which will no doubt make the world a better place. The bad news: I’m getting an early taste of what it feels like to be older.

Suffering with this injury has given me some pause for thought on just how easy it is to take health and mobility for granted. Certain activities that would normally be completely painless, such as shampooing my hair or parking my car, have become extremely painful. And, because I haven’t been injured long enough to be completely conditioned out of doing these things in a way that causes pain, I’m constantly hurting myself. I’ve been through three major surgeries at this point in my life (at 9 years old, 24 and 25) and each time as I’ve recovered, I’ve had the “revelation” of how fortunate one is to be in good health. While this may not compare to the surgery recoveries that I’ve endured, I’ve been flirting with a similar revelation in the past couple of weeks: when my arm is back to normal (assuming this won’t become a chronic or lasting problem), I will be very fortunate and should appreciate every day the sheer joy of being able to move freely. The second revelation that I had was more sobering: I will probably forget this message after my arm is better, just as I forgot it each time I’ve recovered in the past and I’ll start taking my health for granted like always. But, I will try not to return to that way of thinking, and I think that I have a better chance at success now because my general outlook has changed in recent years.

Over the past few years I've discovered that I love to exercise; I start every day on the Nordic track (after a light breakfast, to provide some much needed—and quickly expended—energy). I think that I’ve gradually become addicted (or dependent, at least) to the endorphin rush that comes with a body-pounding workout. Also, as I explained to Jim during my 2-day workout-hiatus following the injury, I’m a sub-100 pound girl but I have the daily food lust of a 200-pound man—and those extra calories have to go somewhere. After 2 long days off from working out, I was back in business (and back to eating like a pig).

It occurred to me when I was back in the swing of things on the Nordic track just how happy I was to be back on it again; not just for the allowance it gives me in eating but because I really enjoyed the workout. I enjoyed much more than I had in a long time, and honestly treasured each second that I could devote to the exercise. As much as I thought I loved exercise before, I think this injury gave me a newfound appreciation for it, while also giving me a new respect for the limitations of my body. I eventually returned to the gym for non-arm-engaging aerobic activity. I usually visit the gym for weight training but, since my weight workouts usually focus primarily on my upper back, chest and arms (with some legs thrown in to help support my knees, which occasionally cause me trouble), I could not yet engage in weight training that day. At one point, I caught myself watching someone doing a pull-up, and an intense feeling of envy overcame me. Maybe this speaks to a newfound appreciation, and maybe I’ve got a fighting chance of not returning to being ungrateful for good health and mobility as I’ve always done in the past.

So, now that I’ve given my love-ode to the Nordic Track, I’ll get on to some food related talk. April 20th was Jim’s birthday—the big 4-0. We stayed in on Friday night, and went to brew beer on Saturday at the local brew-on-premises brewpub. I wanted to have a special dinner to celebrate the big day, but I also knew that I would be in no shape to make dinner by the time we arrived home (it takes between 3-4 hours to brew, and they have beer on tap: you do the math). So, I prepared the bulk of the meal in advance, with only minimal grilling work to be done when we arrived home.

I knew we’d be hungry when we got home, so I prepared a couple of dips for us to enjoy while dinner cooked. I made my usual guacamole (I gave the recipe in a previous entry)—although this time it was a very chunky dip because I had proportionally less avocado than tomato and peppers (but I actually prefer a chunky guac with lots of adjuncts—if I wanted pureed avocado, I’d just make that). I also threw together a horseradish mustard dip that we sometimes have on soft pretzels or on the roast beef and Gruyere crostini treats that I sometimes make. It’s a really simple dip, mixed by eye-measurements until the thickness and horseradish/mustard balance are just right. I combine light sour cream, non-fat buttermilk, prepared horseradish, whole grain mustard, salt and pepper and blend until smooth with a fork. Served on hard or soft pretzels, or even over Bratwurst, it’s a tasty treat.

I’ve mentioned in previous posts that I’m not a big fan of beef. Because of this, we hardly eat beef at home. However, Jim loves beef. On the rare occasions that we actually eat out, he almost always takes the opportunity to get a nice big hamburger. So, for his birthday dinner I offered to make steak, but only if I could have a different protein. So surf and turf seemed to be the answer. Jim loves beef, but he’s no fool either: he also loves scallops. Our chosen proteins for the birthday meal became steak (as lean a cut as I could find; he’s turning 40, and we want to keep him around for a while), gigantic sea scallops and shrimp. All of these items were to be coated with a couple of simple spice rubs that I saw in this month’s Cooking Light and grilled to perfection.

To go alongside, I prepared a cold quinoa salad with a roasted garlic dressing (and a load of veggies, steamed and shocked with cool water). First, I roasted a head of garlic in the oven. This is really easy to do: strip off the outermost layers of loose paper from the garlic head (leaving the tight papers on and the head intact), wrap the head in foil (a little loosely), and pop it in the oven at about 400 degrees for a about an hour. When it emerges, you’ll have soft, sweet roasted garlic cloves. I took the yield from the roasted garlic head and combined the softened cloves in the mini-food processor with some sherry vinegar, dried thyme, mustard, some jarred roasted red peppers and a dash of vegetable broth (to provide some liquid for blending, in place of the more commonly used oil). I tossed the cooked quinoa with the dressing and added some green beans and carrots that I had cooked lightly in the microwave and shocked with cold water to set their fresh and vibrant color. I sprinkled the salad with sliced green onions and minced Italian parsley and put the salad in the fridge, so the flavors would meld. Now one of our side dishes would be ready for consumption once we arrived home.

Jim had long ago expressed an interested in baked beans, so his birthday meal seemed a prime opportunity to deliver them. Having never made them before, and having no particular recipe in mind (or real idea of what they were generally comprised of), the recipe research began. I surveyed probably 20 or so baked bean recipes before developing my own formula and method. The method here was crucial, since most baked bean recipes would have you bake the beans in a low oven (250 to 300) for over an hour (I saw one that went as high as 3 hours), adding additional liquid during the baking time to prevent drying. Since we would be away for most the afternoon, and since we would want to eat soon after arriving home, this method would not work. So I improvised a stove-top method, which I could transfer to the crockpot to keep warm while we were away brewing beer.

The beans were to have a maple flavor because, as you’ll likely discover in an upcoming post about his birthday party, Jim loves maple syrup. He (apparently—I didn’t know this until he told me) eats at least a spoonful of it every night before bedtime. I used dried navy and great northern beans (soaked overnight), which I cooked on the stovetop for about 1-2 hours with some smashed garlic cloves and bay leaves. I didn’t make too much in the way of notes regarding the sauce that I prepared; I started with a sheet of paper with various ingredients scribbled on it (diced or crushed tomatoes, various spices, honey or maple syrup or brown sugar, balsamic or apple cider vinegar…and many other options), and proceed to throw a bunch of that stuff together until I created a sauce that tasted sufficiently good to be married with the beans. (Two weeks later I did the same thing—make a great batch of BBQ baked beans and again failed to write it down.) One day, I’ll write down what I put in the beans and post it, but it doesn’t seem fair to try to summarize it now when I have no real recollection of exactly what I did. (That was a big, long apology for not posting the recipe).

For the vegetable component of our dinner, we decided to use the grill also. I cut up an assortment of vegetables that do well on skewers, including red bell peppers, red onion, yellow squash and zucchini. When we arrived home, we threaded these onto skewers, along with cherry tomatoes and mushrooms and grilled them off. I also steamed some broccoli, which would be mixed with the grilled vegetables and the dressing I prepared for them. The dressing consisted of pineapple juice, apple cider vinegar, fresh basil and Dijon mustard, all blended in the food processor. This is a variation of a recipe from the Whole Foods cookbook, but of course they use what I consider to be an insane (and completely unnecessary) amount of oil; my version has none. The hot veggies get tossed in this mixture and then they’re ready to eat.

For dessert, I prepared a “birthday brownie” rather than a cake. We had just come back from a heavy weekend of eating in my least favorite American city (LV), and having an entire cake in the house for just the two of us seemed like a bad idea. So, I made our favorite low fat brownie recipe (it makes an 8 by 8 brownie), which is deceivingly decadent and fudgy for it’s low fat content. I topped it with a honey-fudge glaze; also a low-fat (but high sugar, obviously) concoction. The secret to low fat chocolate baking is cocoa power, and finding a way not to add tons of oil. Cocoa powder has hardly any fat, especially compared to bar chocolate, which contains milk solids. The brownie was delightful and offered us a way to “toast” his birthday without having a huge cake taunting us from the refrigerator for days.

So, that was Jim’s birthday celebration (the private one; we planned to have a party in a couple of weeks—more to come on that later). Now I’m on the long road to recovery, but I’ll continue to hoist my arm onto the countertop so I can prepare us relatively healthful meals in the coming days. I’m still kickin’ despite the injury and refuse to slow down too much; anyone who knows me well knows that I don’t believe in breaks (for myself, at least). Someday, that will probably be my undoing.

Sunday, April 8, 2007

New Ingredient of the Week

In my routine cooking-magazine-reading, I’ve recently come across a great number of articles on Brussels sprouts. I’ve never had them before (at least to my knowledge—who knows, maybe my parents fed them to me so long ago that I don’t remember), so I was inclined to fiddle with them and see if they would be a candidate for inclusion in my regular repertoire. I mentioned my desire to venture into Brussels sprouts to Jim one evening, and he was not in full support of the idea. “They’re gross”, he said; “they smell awful when they cook, and they don’t taste much better”. Vegetable freak that I am, I couldn’t face the idea that a vegetable could be inherently disgusting. This must be a mistake; whoever served them to you must not have cooked them right. Rule #1 of the house: Don’t taunt the “chef” and don’t challenge the “chef”. What happens if you do? You get to eat Brussels sprouts.

Of course, the goal here was not to inflict Brussels sprouts-torture; I was now on a mission to prove to Jim that he did not hate this vegetable. Years ago, he hated beans; would never eat them. Now he loves beans (see, you can change a man…just kidding—I had to say it). So maybe Brussels sprouts are next—nothing is impossible… Incidentally, my food tastes have changed substantially as well—I hated mustard and vinegar all of my life and in the past two years have come to love them. So, we change and grow together; that’s what it’s all about, right?

Back to the food…since I was forcing Brussels sprouts on him, I wanted to make a main dish that was sure to be a hit. I had seen a recipe in Eating Well magazine for a Mahi-mahi crusted with horseradish infused potatoes. We don’t eat white potatoes too often, so that would be a treat (I usually opt for sweet potatoes because they have so much flavor—and therefore don’t beg for too much adornment—and also because they’re packed with nutrients and fiber). Also, we both go nuts over the pungent taste of horseradish, so that seemed likely to be a winner. And I love fish, so we all win. Since I followed their recipe fairly closely (with the exception of using fresh potatoes that I had on hand, instead of pre-shredded ones from the store), I won’t detail the recipe here. The beauty is that Eating Well publishes their recipes on their website for free; so if you have the urge to make it, just go to their website and look it up. And you should, because it was amazing. The tang of the horseradish paired so well with the sweet flesh of the fish, making it seem even sweeter and more succulent than I remember Mahi-mahi as being.

In preparation for Brussels sprouts night on Saturday, I spent the week researching various issues related to this vegetable. First, how and what do you buy? Based on what I read, it seemed that baby Brussels sprouts were the ticket; many sources claimed that they were more delicately flavored. Plus, that’s mostly what I’ve seen as I’ve wandered through the produce section with wide-eyes. So baby Brussels sprouts it is (luckily when we went to the store that day, they were there—too often, I’ll see something at the store everyday and not buy it, and the one time I need it they’re out of it).

The next issue to tackle was how to prep and cook them. I looked to Cooks’ Illustrated magazine first; this is often the first place I turn to for general guidance on an ingredient or cooking process, because of their scientific approach and relentless pursuit of perfection (which is very close to my heart). They recommended steaming the sprouts, and claimed that the step of cutting a small x into the bottom of each one was unnecessary. I had read in other places that you’re supposed to cut an x into the bottom to ensure that the sprout would cook evenly; apparently one pitfall with these is overcooking (that’s when they end up not tasting good, apparently), so if you have to overcook part of the sprout to get the other part done there could be trouble. But CI claimed that this was unnecessary; I took their information and moved on to additional research. I mined the internet mostly, in search of other cooking techniques. Roasting seemed to be popular; many sources claimed that roasting brought out the sweet flavor of the sprouts (which roasting will often do, even for something as bitter as eggplant). This appealed to me because roasting is generally my preferred method of vegetable preparation. Roasting it is. And just to be safe, I’ll go ahead and cut those x’s in the bottom; I have one chance here to prove that Brussels sprouts are not gross, so there will be no room for error here. So, you can see me below, as I peel the outer leaves off of each Brussels sprout and cut a small x in the bottom (ok, so it’s a little labor intensive).
We sampled a few fine beers as I cooked, starting out with one of my favorites: J.W. Lees’ Harvest Ale, Aged in Calvados Casks. The regular J.W. Lees’ Harvest ale (minus the Calvados casks) is an English Barleywine, a style of beer that is typically high in alcohol and very malty, often with a thick mouthfeel (not to be confused with American barleywines, which are also high in alcohol, but which are often more heavily hopped and are therefore not as malty). It was a bit too cold when we took it out of the refrigerator, so we let our glasses warm a bit on the countertop; it’s a shame to drink a beer like this too cold, because you really won’t taste it. It had a fruity aroma, with an clear apple essence (Calvados is an apple brandy, just in case that’s not common knowledge). The alcohol was apparent in the nose, but considering that this beer clocks in at 11.5% ABV, I guess that shouldn’t come as too much of a shock. In mouthfeel, it was syrupy and thick—as would be expected from the style. The taste was definitely sweet, leaving almost a sugary feeling on the lips. (But I’m such a nut for anything sweet so you know I’m going to dig that.) Overall, it was very drinkable (dangerously so at 11.5% ABV, and at $6.99 for 9.3 fluid ounces—this was a splurge, especially for a cheap chick like myself), and the alcohol was not nearly as apparent in the taste as it was on the nose. In the end, it was a terrific tummy-warmer (first of the night, no food in the belly yet), with a satisfying malty-sweetness and the subtle flavors of apple and brandy.
Now that I had a treat to sip on, I could concentrate on the flavoring for the Brussels sprouts. Since I was roasting them, this seemed like familiar territory; I dressed them in a fashion similar to most roasted veggies that I cook. I tossed them in a roasting pan with diced shallot, finely diced carrot, garlic (how much? I don’t know—lots?), chicken broth, marsala wine and dried thyme. I minced some parsley and sliced green onions to add to them at or near the end of cooking (dried herbs and the beginning, fresh herbs at the end—a great general rule of thumb for cooking). Just in case Jim was right and these things were not palatable, I also prepared a separate roasted vegetable medley, so that we would not be without a veggie with our dinner (now that would be a disaster). This preparation was pretty standard as well: minced garlic, the veggie assortment (cremini mushrooms, asparagus, carrot, onion), tossed with some dried tarragon, sherry wine and a dash of chicken broth. These baked alongside the Brussels sprouts in a 400 degree oven. For how long? Until they were done. (Read: um, I don’t remember—I’m writing this three weeks after the fact from notes written three days after I cooked it; I’ve been a little distracted, new job and all).
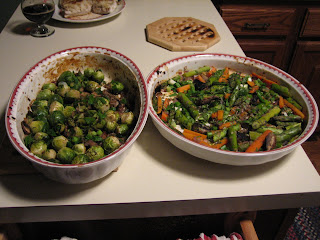
The next beer that we tasted was the Old Horizontal from Victory Brewing Co. This is an American barleywine, which is similar to the English style in the ABV range (this one landed at 11%), but you can expect it to have a more clear hop presence. However, since there are a ton of malts involved, beers in this style generally do not taste bitter despite the high bitterness rating that many of them have. What you really end up with is a great balance of hops and malts, such that you can really enjoy the hop flavor and not spend the evening puckering your lips because the beer you’re drinking is akin to sucking on a lemon. (That’s my rant—can you tell I’m not into aggressively-hopped, ultra bitter tasting beers? I’m a malt gal.). The Old Horizontal had a dark amber color, and a hoppy aroma. The hops came through on the flavor, but it was a fine balance with the sweet malts. A great example of the American barleywine style; definitely prime for a repeat.

I’m pretty predicable when it comes to meal planning. Each meal generally has a protein, a grain and a ton of veggies (even one-dish meals will usually contain all three components). I had the protein and veggies covered. For the grain in our meal, I prepared a mushroom wild rice. I steeped dried wild mushrooms in hot water for about 30 minutes. I drained them, reserving their liquid to be used as the cooking liquid for the rice. I sautéed some onion, carrot and celery until soft. I then added a load of minced garlic, a healthy splash of sherry wine and some dried thyme. I then added some sliced fresh cremini mushrooms, and the re-hydrated wild mushrooms (chopped once they were cool enough to handle) and sautéed until the fresh mushrooms began to soften. I then added 2/3 cup of wild rice and a couple of tablespoons of brown basmati rice (rinsed in cold water before being added, of course), and sautéed for an additional minute. I added the liquid from the mushroom-soak, threw the top on and let it rip. Wild rice takes a bit of time; about 50 minutes until it’s ready to eat.

That means that we have time for one more beer before dinner (take heart, we’re splitting single bottles here). The third victim was the Czar by Avery brewing company. This is a Russian Imperial Stout, tipping the scales at 11.04% ABV. This is one of our favorite styles of beer, and we actually brewed a batch of Russian Imperial Stout last fall (we’ve still got about 2-3 cases in our basement). Beers in this style generally amount to super-stouts. They are higher in alcohol than your standard English stout and will typically have a ton of roasted flavor (and if you’re lucky, some chocolate or coffee notes). This poured an intense dark color (“There’s none more blacker”, said Jim—stolen from “This is Spinal Tap”). There was a slight hop aroma, but you mostly sensed a roasted malt smell. The taste was divine: a clear chocolate note, with hints of coffee. Not as much of a roasted flavor as you might expect. It was very nicely balanced, and a little too easy to drink considering the level of alcohol. This particular selection has been one of our favorites of late, when we can get it. We’ve had the pleasure of enjoying some other great Russian Imperial Stouts: Victory’s Storm King, Stone’s Russian Imperial Stout, and the Old Heathen by Weyerbacher Brewing…and I know I’m forgetting something (I’ll update later if it comes to me). You can see the Czar pictured below with the finished fish (and me trying to hide from the camera, but doing a really poor job of it).
What was the verdict on the Brussels sprouts? He thought they were great. I win! He said that he would definitely eat them again, but only if I made them (what a brownnose :-)). So, I emerged victorious from the Brussels sprouts challenge…what to try next?

Friday, March 30, 2007

More to Come Soon

I've been away from writing, but I'll be posting again soon--I promise. I have over a week's backlog of dinners and about 2 weeks of backlogged beer reviews to post. Don't worry--it's not all from memory; I've been taking notes:) More content to come soon, I promise.

Saturday, March 17, 2007

Adventures in Dried Beans

In the past, I have avoided certain ingredients due to fear of the unknown, usually because they seem too complicated to deal with and I’m not prepared (or lack the necessary time) to learn. I resolved in the past year to no longer face new ingredients with fear and instead to charge ahead, try my hand at them, and see what happens. Until recently, my cooking with beans involved mostly canned beans, and not beans in their dried state. The only dried beans that I had used were lentils, because they did not require a pre-soaking period. It was the pre-soaking period, as well as the seemingly numerous instructions surrounding the use of dried beans (pre-soaking, skimming foam from the top of the cooking beans, etc.) that had given me pause for thought on using them in the first place. I eventually cast my fear aside, performed the necessary research and got started on incorporating dried beans into my cooking repertoire.

In my first attempt with dried beans used great northern and navy beans in a soup. I followed the pre-soaking directions that I had read in one of my bean-centric cookbooks. The results were great; the beans had a great flavor and a nicer texture than I’ve obtained in the past using canned beans in a similar application. Dried beans were a hit.

The next time I used the dried beans, I attempted to mimic a cold bean salad that I had tried from the Whole Foods salad bar. It was a white bean salad, with some red onion, fresh dill and lemon. This time, I was a little short on time so I decided to use what’s known as the “quick soaking method” for soaking the beans. This method involves bringing the beans to a boil in a large amount of water, turning off the heat and letting them sit in the hot water for a couple of hours. This is supposed to accomplish the same effect as the longer soak in the cold water; some of the more potent starches in the beans (that cause gastric and intestinal upset) are supposed to be dissolved in the soaking process (and the long and quick soak are supposed to be equally effective). So, I followed the quick soaking method and then cooked the beans as usual. I combined the rest of my chosen ingredients for the salad and chilled it for a few hours to meld. We ate dinner a few hours later, with this salad as a side dish to a main that I cannot remember. At the time, the verdict was good; the texture of the beans was soft yet firm, and the flavor of the salad was great.

Until the next day. Although we really both liked the salad, mysteriously neither of us even touched the leftovers. A few days later, when I was performing refrigerator clean-out, I mentioned to Jim how neither of us ate any of the bean leftovers. Then I asked him: did they get to you like they got to me? Yes. Both of us struggled for over a day with some of the most irritating intestinal upset either of us had ever experienced, but had not mentioned it to each other. Well, the full container of leftover bean salad was enough of an indicator that there was something wrong (usually I’ll eat any leftovers; in this case, I was just plain scared of those). I think I’ll do the long cold pre-soaking from now on; better safe than sorry (and gassy).

For Friday night’s dinner this week I decided to make a black bean soup using a bag of black beans that I recently purchased. This was my first time using dried black beans. I got up plenty early in the day, to ensure the 8-hour minimum pre-soak that would ensure intestinal peace. By evening time, the beans had soaked long enough so I began the rest of the soup preparation.

I sautéed one diced sweet yellow onion, three ribs of celery (diced), three diced carrots, one diced red bell pepper, one diced poblano pepper and two small slices of Canadian bacon (diced finely) over medium heat until they were softened. I added 10 cloves of minced garlic and two seeded, de-ribbed and diced jalapeno peppers, and cooked the mixture about one minute longer. I then added about 1 T of dried oregano, 2 t of ground cumin, 1 t of ground coriander, 1 T of New Mexico chili powder, and a dash of garlic powder (for a little extra shot of garlic…because 10 cloves clearly is not enough). I then added the 1-cup of pre-soaked and drained beans, and about 4 cups of chicken stock and two bay leaves. I brought the mixture to a boil, covered the pot partially and let it boil gently for about an hour and a half.

I intended to add tomato and sherry (of course) to the beans, but waited until most of the cooking time had elapsed before doing so. I have read in many places that acids added in the early stages of bean cooking will cause the skins to toughen and increase the cooking time. The last thing I wanted was undercooked beans, so I waited until the beans were about a half hour away from being done before adding about one-half can of diced tomatoes and one-half can of crushed tomatoes (this was just because that’s what I had on hand; one whole can of either would probably do just fine). I let the beans continue to cook for another half hour or so, adding a little more spices and herbs to taste. I then added about ½ of chopped cilantro, and some extra chopped poblano and jalapeno peppers. Then, I whipped out the immersion blender (pictured below, for reference). We wanted a fairly chunky soup, but I did want a thicker broth than we had at that point. So, a short blending with this fine piece of equipment did the trick. After blending I added some additional chopped fresh cilantro, some chopped green onions and some more chopped peppers. I served diced red onion, additional cilantro, chopped avocado, additional green onion and sour cream as garnishes.

We also had crab quesadillas with our soup. I had some left over crab quesadilla filling in the freezer from the Super Bowl, so I added the left over crabmeat from last night (because I didn’t use the entire 16 ounce cup on the pizza) and some extra cilantro to the leftover filling. The leftover filling basically consists of a diced yellow onion, cooked over low heat. I added some flour and then a little low-fat milk and broth to make a roux. I cooked this for a bit and then added some light cream cheese. Off heat, I added crab, a ton of chopped cilantro and some hot peppers. Used as a filling in whole-wheat tortillas, it cooks up very nicely in a large omelet pan, and the final product will hold (wrapped in foil) nicely in the oven for a good amount of time.

I, of course, also had a side salad (not pictured), with some salsa and a dash of light sour cream for a dressing. Now, we’ll just keep our fingers crossed that the 8-hour pre-soaking time was enough to keep us in the clear for the next day.

I’m Unemployed; Let’s have pizza

I’ve had a craving lately for my homemade pizza, but I didn’t have the opportunity to make it until this Thursday. It’s not normally much of a weeknight meal, due to the 2 hour rising time required for the dough (seeing as how I typically get home from work at 8 pm or later, that really doesn’t work). But, as of Wednesday of this week I am blissfully unemployed (until Monday, that is). So, I finally had the opportunity to make pizza on a weeknight.

Hours before Jim was due to arrive home from work, I began the dough. I first made this dough on Christmas, when I prepared a Pissaladiere as an appetizer to our Christmas meal (this is a French Provencal “pizza” covered with caramelized onions, olives, thyme and anchovies). The dough was tasty and easy to work with, and I thought it would make a fine dough for a slightly more mainstream pizza. This dough was made entirely with white flour, however, which just won’t do. So I swapped out ¾ of the bread flour with whole-wheat flour to make a whole-wheat crust. Those results were good; the crust was still easy to work with and baked up well, but now had the wonderful hearty flavor of whole wheat. Then, I had the idea to add quinoa flour to the crust. If you haven’t had quinoa, try it. It’s actually not a grain (it’s the seed of a grassy plant), but it behaves much like one for cooking purposes (so it’s most often referred to as a grain). It has a great, nutty flavor; really unlike anything else. It’s probably my favorite “grain” to use in cooking, because of its short cooking time and great taste. It also has a great nutritional profile; it’s naturally fairly low in fat, high in protein (it’s either a complete protein or really close; unusual for a grain) and high in fiber. I had a sack of quinoa flour in the house, which I had bought with the intent of adding it to baked goods here and there. Why not start now?

The flour blend for the quinoa pizza dough consists of ½ c bread flour (this is a non-whole wheat product), 1 cup of stone ground whole-wheat flour and ½ cup of quinoa flour. Quinoa flour is a gluten free product, so you can’t go too hog-wild in substituting it for other flours without changing the nature of your baked good. From the research I did, it seemed that the consensus was that you could substitute up to half of your regular flour with quinoa flour. Being painfully risk averse, I went for the ¼ substitution instead.

I placed the flours in the work bowl of my food processor, which I fitted with the dough blade (it has shorter arms and is more blunt than the regular chopping blade). I added 1 ½ t of rapid rise yeast, about 1 t of salt and ½ t of sugar. I pulsed the machine to blend. I added about 1 T of flaxseed meal (which is a replacement for fats in cooking, rather than flours—this surprised me, since it has the appearance of a flour-like product) and a scant 2 t of olive oil. With the machine still running, I slowly poured in about 1 c of warm water (about 110 degrees). I poured in the water until the dough formed a ball and spun around the outside of the work bowl. I then turned the dough out onto a floured cutting board and kneaded it for a couple of minutes. I kneaded this dough longer than I would have for a non-quinoa dough, because of the missing gluten in the quinoa flour. As I understand it, kneading dough spurs the formation of gluten, which is what gives baked goods their structure. It would seem that a dough partially comprised of a gluten-free flour would have a disadvantage for gluten formation, so maybe a little extra kneading would help the process. Besides that, it’s fun.

I formed the dough into a ball and placed it in a 4-cup glass measuring cup that I had sprayed with olive oil (using my handy olive oil sprayer—now that was a great purchase). The use of the glass measuring cup was a tip that I picked up from Cook’s Illustrated magazine. Since yeasted dough recipes usually will tell you let something rise until something has “doubled in volume”, a measuring cup with clear markings will help you to judge when the sufficient rise has occurred. I covered it loosely with plastic wrap, and continued my chores elsewhere in the house while the yeast did its work. It was nice and warm in the house that day (it was freakishly warm outside, having reached nearly 70 degrees), so I didn’t need to make any special arrangements to provide a warm spot for the rise (sometimes I’ll turn the oven on a low setting and set the bowl on the stovetop to ensure a warm enough environment for the yeast to grow).

To celebrate my newfound freedom from employment, we had gone out the night before with friends to a beer bar/restaurant that serves brick oven pizzas. One of the pizzas that we shared was a lobster pizza. It was so good; I can hardly describe (although they’re pretty cheap with the lobster—what do you expect, though?). We have no lobster at home, but we do have lots of crab (from the Giant food crab sale last week)…

I typically split the pizza dough into 2 smaller pizzas (they probably end up being 10-12 inches), each with different toppings. So I planned to make one of the pizzas will be a crabmeat pizza, with a little Fontina cheese and some fresh tarragon (the pizza at the restaurant had fresh tarragon on it; tarragon is one of my favorite herbs and it was a stand-out on the pizza). The other would be topped with an assortment of vegetables, fresh basil, goat cheese and freshly grated parmesan.

I set out to Whole Foods to grab a couple of last minute ingredients for dinner. One of the items on the list was the fresh tarragon that I craved so badly. Guess what…no tarragon. Great. They did, however, have Chervil (which is interesting, because when I want Chervil, I can almost never find it). Chervil is a far more muted than tarragon, but it does have a flavor slightly reminiscent of tarragon—a slight anise touch. So, I decided that I would sprinkle some dried tarragon on the pizza and use fresh Chervil as well. I picked up the remaining items for dinner (including a couple of craft beers, which I got carded for—yet again) and headed home.

One of the toppings for the pizza was to be caramelized onions. These are so easy to make, but they do take a little time (but very little attention—you can just let them cook away and wander back every-so-often to give them a little stir). Take a sweet yellow onion, halve and peel it. Cut off the root-end and cut the onion into long slices. Heat a little oil in a non-stick fry pan (medium to medium-high heat; we don’t want them to cook too fast). Add the onions and allow them to soften. When they start to turn a little translucent, add a bit of water and a sprinkle of sugar. And just let them continue to stew away, stirring here-and-there and adding additional water as needed. In about a half-hour, you’ll have soft and sweet onions.

The two pizzas are pictured below, ready to be cut and consumed. Yes, they are very "rustic"; that's how we like them. The veggie pizza was adorned with steamed broccoli, portobello mushrooms, cremini mushrooms, chopped tomatoes, basil, red bell peppers, caramelized onions, goat cheese and parmesan. The crab pizza had fontina cheese, caramelized onions, portobello mushrooms, dried tarragon and fresh chervil. Oh yeah, and crab; lots of it. You’ll probably notice that the pizzas are not soaking in cheese; that’s the health-conscious part of me rearing it’s ugly (but fit) head. Not being a total nut, I provided Jim with a generous amount of extra cheese that he could add to his slices.

Strange how everything tastes better when you don’t have to go to work the next day…here’s to a long weekend of long-awaited freedom (and a plunge into the unknown come Monday).

Friday, March 16, 2007

Sunday Night, Done Light


After a weekend of championship eating, I needed a light meal on Sunday night. I stuffed myself silly on Saturday at the bridal shower/bachelorette party, including a major over indulgence in a chocolate cake. There was a large amount of cake left over at the end of the night and I happily volunteered to take some home—way to take one for the team there. That cake was so good, as I think of it now I can feel that there’s a longing look in my eye…now all I have left is my fond memories of our time together. It was truly great. And it necessitated a Sunday night detox.

What’s best for a light evening meal? Soup, of course. Not a cream soup…something vegetable based. Fire-roasted Tomato and Fennel Soup should do the trick. This soup has its roots in a recipe from Fine Cooking magazine (November 2006; a great publication, if you have the time or inclination to check it out). I’ve made it a few times; eliminating, adding and changing ingredients—to the point where I feel comfortable calling it my own, so long as I acknowledge that the seed for the idea was provided by Fine Cooking.

I’ve been away from writing for a few days…wrapping up in preparation for leaving my job of nearly seven years. So, I made this on Sunday night but haven’t had a chance to write until now (Friday morning). And I didn’t actually take any notes as to what I did this time (yet another one of those instances where I just throw a bunch of stuff together and the dish tastes a little different every time I make it). So I’m just covering my ass so that if I misquote an ingredient, I’ve already got a defense in place…

To start, dice a large sweet yellow onion, one large fennel bulb (core removed, of course) and three or four large carrots. Heat these in a large soup pot with a spray of olive oil, over medium-high heat. You don’t really want them to brown, so don’t crank up the heat too high. Instead, we’re going for a gentle softening of the aromatics. When the onion, fennel and carrot are well softened, add 4-5 minced (or pressed) garlic cloves, 1 T of anise (or fennel) seeds and about 1 t of dried thyme. Cook about 1 minute longer, making sure not to burn the garlic, and then add a healthy splash of dry sherry (seems like I use this in everything, right? I do.) Add 2 cans of undrained fire-roasted tomatoes (Muir Glen is the only company that makes these, as far as I’ve seen), and about 1 cup of chicken broth (no idea on how much I really used here—do what seems right for the degree of looseness you want in your soup). Add a splash of orange juice (this was in the original recipe and it’s a fine idea, since orange and fennel marry so well together). Increase the heat and allow the mixture to come to a slow boil. Let it cook at least 15 minutes, but feel free to let it go longer if you have the time (adding additional broth as needed to keep the mixture from becoming to stew-like). Add about 1 cup of torn fresh basil leaves and a splash of milk (Fine Cooking called for cream, and a fairly good dose of it—I don’t think so).
Now, the fun part. I bought an immersion blender a couple of months ago (to whittle away at the build-up of Williams Sonoma gift cards that I had—somehow, someone got the idea that I like cooking…). The primary reason that I bought it was for making soups, and not wanting to be forced to ladle hot soup into a blender and play the-not having the soup explode out of the top of the blender when I turn in on-game. I had a bad experience with that exact issue. Last fall, Jim was working really insane hours on a project (the minimum weekly requirement was 65 hours, which they increased to 70 at the end). There was an Oktoberfest celebration that we had wanted to attend on a Saturday, but he had to work. He was so beaten down by the project by that point (these crazy hours had been going for months straight), so I felt like he needed a pick-me-up. So I made Oktoberfest at home. I spent the week leading up to that Saturday researching German cooking and planning out a full-scale German meal (which I thought he’d appreciate, having lived in Germany for four years as a young man). One of the dishes that I made was a roasted pork-tenderloin with a beer sauce. It was the beer sauce that got me in trouble. It involved making a soupy mixture of onions, beer and other flavorings and then pureeing the mixture in a blender (while it’s still hot). I transferred a portion of the sauce to the blender, held the top in place with a towel and turned it on. I was immediately covered in hot beer sauce. My kitchen was covered in hot beer sauce. This was an unbelievable disaster—what a mess. In particular, since I was working on a very tight schedule (I wanted to greet him when he came home from work with appetizers and some silly German music I got from iTunes…with dinner in good shape and ready for final preparations so we could just relax). The experience of being soaked in hot beer and onion and having to hunt down random pools of beer sauce all over my kitchen convinced me that the immersion blender was the way to go from then on. $80, well spent.

So, returning to the point at hand…if you don’t have an immersion blender you can ladle small portions of the soup into a blender (don’t fill it even half way) and carefully puree it (start at the slowest speed and work your way up—trust me.) Otherwise, just lower your immersion blender into the pot and give it a good blending. We like this soup sort of rustic and chunky, so I don’t generally puree it too much. But if you like your tomato soup as smooth as silk, by all means—blend to your heart’s content. Return the soup to a slow boil, let it simmer away for a few more minutes and then you’re ready to eat. It's pictured below, garnished with a bit of goat cheese (the side salad made the picture this time). Easy, light and quick. Perfect for a Sunday night.